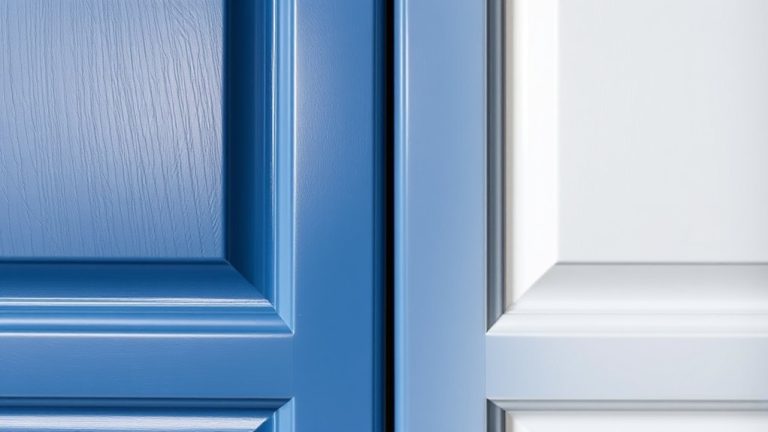
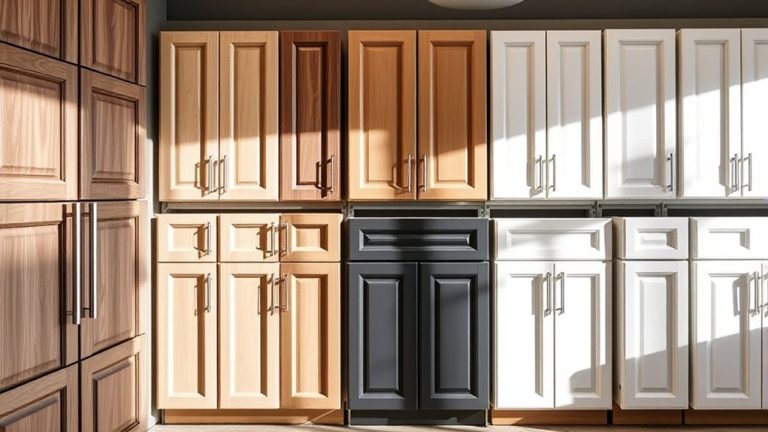
Best Kitchen Cabinet Paints for a Flawless Finish
Are you dreaming of a kitchen makeover but worried about achieving that perfect, flawless finish on your cabinets? You’re not alone—many people struggle with finding the right paints and techniques to get professional-looking results that last.
The key is choosing the best kitchen cabinet paints designed for durability and moisture resistance. For a flawless finish, choose high-quality paints designed for durability and moisture resistance, like semi-gloss or satin finishes.
Neutral shades like white, gray, or beige are versatile, but bold colors can add personality if they match your style. Proper surface prep, using the right tools, and applying thin coats guarantee smooth results.
Avoid common mistakes like skipping sanding or rushing coats. Keep exploring if you want to learn how to create professional-looking cabinets that last.
Key Takeaways
- Choose high-quality, durable paints designed specifically for kitchens to resist chipping, moisture, and frequent cleaning.
- Opt for semi-gloss or satin finishes for a smooth, reflective surface that’s easy to clean and maintain.
- Use eco-friendly, low-VOC paints to create a healthier environment and ensure even drying for a flawless, long-lasting look.
- Properly prepare your surfaces by cleaning, sanding, and filling any imperfections before painting for the best adhesion.
- Apply thin, even coats with good brushes or rollers, and let each layer dry completely before adding the next for a professional finish.
How to Choose the Best Kitchen Cabinet Paint

Choosing the right kitchen cabinet paint can really change the look and durability of your cabinets. Start by thinking about color coordination; your cabinet color should go well with your walls, countertops, and overall kitchen style.
Neutral shades like whites, grays, or beiges are versatile, while bold colors can add personality. Next, consider your hardware, since it affects your paint choice. If you’re updating handles or knobs, pick a paint color that complements or contrasts nicely with your hardware’s finish.
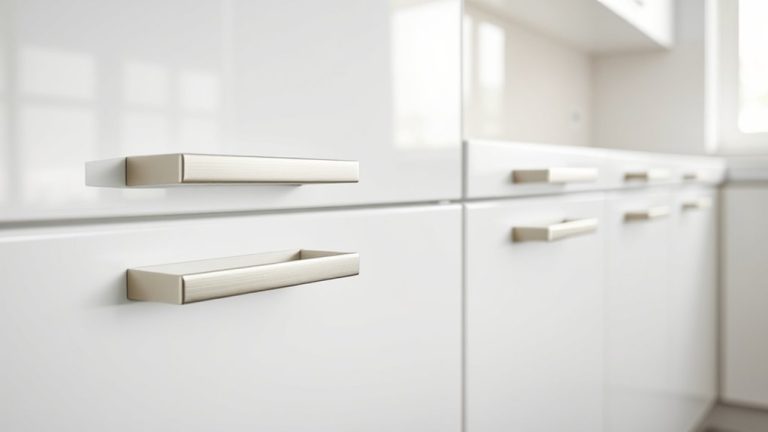
For example, brushed nickel hardware works well with soft gray or white cabinets. If you want a seamless look, match your hardware finish to your cabinet paint. Also, think about the paint’s finish—matte, satin, or semi-gloss—based on how much shine you want and how you want to highlight your hardware.
What Factors Make a Kitchen Cabinet Finish Last?
The durability of your kitchen cabinet finish really comes down to the quality of the paint you pick. It’s best to go for a paint that’s made to handle high traffic areas and moisture since kitchens can be pretty tough environments.
Also, don’t forget that proper surface preparation and cleaning before you start painting are super important. When the surface is clean and smooth, the paint sticks better and lasts longer.
And of course, using the right application techniques and tools makes a big difference. Taking your time to apply the paint carefully will help you get that smooth, long-lasting finish you’re aiming for.
Quality of Paint Used
When it comes to making sure your kitchen cabinets last, the quality of the paint you choose really matters. Good paints are durable, resist chipping, and keep their finish longer.
Look for paints that stick well and cover nicely, so you don’t need to apply too many coats. Eco-friendly options are great too—they’re better for the environment and usually have fewer harmful chemicals that can break down over time.
Picking a color that fits with your overall kitchen style can also save you from repainting too often. High-quality paints dry evenly and give a smooth finish, making cleaning easier.
Investing in premium paint makes your cabinets look perfect for years. It also means less time and effort on touch-ups and maintenance down the line.
Proper Surface Preparation
Proper surface preparation is crucial because it guarantees your paint adheres firmly and lasts longer. Start by cleaning your cabinets thoroughly to remove grease, dirt, and old paint residue.
Sand the surfaces lightly to create a smooth, even base that promotes better adhesion. Pay attention to details like edges and corners, ensuring they’re well-prepared.
When choosing your paint, consider color coordination to guarantee your new finish complements your kitchen’s overall look. Removing or taping off cabinet hardware is essential to prevent accidental damage or paint on handles.
Proper preparation also involves filling any dents or scratches, then sanding again for a flawless surface. Taking these steps ensures your cabinet finish remains durable, beautiful, and resistant to daily wear.
Application Technique and Tools
Using the right application techniques and tools can really make a difference in ensuring your cabinet finish lasts. When you apply paint properly, it boosts durability and keeps your color matching consistent over time.
To get a flawless finish, follow these steps:
- Use high-quality brushes and rollers to avoid streaks and get even coverage.
- Apply thin, even coats and let each layer dry completely before adding the next.
- A paint sprayer can give you smooth, professional results, especially on detailed areas.
- Keep your workspace free of dust so particles don’t settle on wet paint and mess up the finish.
Which Cabinet Paint Finishes Are Right for Your Style?
Picking the right cabinet paint finish really depends on your personal style and how you use your kitchen. If you’re into a more understated, modern vibe, matte finishes can give you that subtle, sophisticated look. They’re great because they hide fingerprints and smudges pretty well too.
On the other hand, if you love a bit of shine and want your cabinets to reflect light and make the space feel brighter, glossy finishes are the way to go. They add a sleek, polished touch that can really make your kitchen pop.
You might also want to think about textured surfaces if you’re after something a little more unique and tactile. They can bring depth and character to your cabinets. But if you prefer a clean, minimalist look, smooth finishes are perfect—they’re easy to clean and give your kitchen a streamlined feel.
Matte vs. Glossy Finishes
Deciding between matte and glossy finishes really depends on the look and feel you want for your cabinets. A matte sheen gives a soft, muted look that hides fingerprints and imperfections, making it great for a natural or understated style.
On the other hand, a glossy finish offers a shiny, reflective surface that makes colors pop and adds vibrancy. It’s perfect if you’re aiming for a modern or sleek look.
Here are some points to consider:
- Maintenance: Glossy finishes are easier to clean but tend to show fingerprints more.
- Durability: Glossy surfaces are usually more resistant to moisture and scratches.
- Aesthetic: Matte finishes convey subtle elegance, while glossy adds boldness.
- Lighting: Glossy surfaces reflect light and brighten up the space, whereas matte absorbs light, creating a softer ambiance.
Choose based on your style, lifestyle, and the look you want for your cabinets.
Textured vs. Smooth Surfaces
Textured surfaces add depth and tactile interest to your cabinets, creating a more dynamic look that can hide imperfections and fingerprints more effectively. If you prefer a more rustic or traditional style, textured surfaces can add character and warmth, giving your cabinets a handcrafted feel. They also tend to conceal flaws better over time.
On the other hand, smooth finishes offer a sleek, modern appearance that’s easy to clean and maintain. Smooth finishes highlight clean lines and a polished look, making your kitchen feel more contemporary and airy. The choice depends on your style: textured surfaces bring charm and dimension, while smooth finishes emphasize simplicity and elegance.
Consider your aesthetic preferences and maintenance needs when deciding which cabinet paint finish best suits your space.
Best Brands for Durable Kitchen Cabinet Paint

When choosing a durable paint for your kitchen cabinets, some brands really stand out for their quality and longevity. These brands are known for resisting chips, stains, and wear, so your cabinets stay looking great for years.
Here are four top brands to consider:
- Benjamin Moore Advance offers excellent durability, a smooth finish, and a wide range of colors to match your style.
- Sherwin-Williams ProClassic is known for its high adhesion and works well with different hardware options, giving you a flawless look.
- Behr Alkyd Semi-Gloss Enamel provides durability and easy cleanup, perfect for busy kitchens.
- Farrow & Ball Estate Eggshell combines elegance with resilience, great for sophisticated color schemes and hardware choices.
Choosing any of these brands helps your cabinets resist everyday wear while giving you flexibility with hardware options. You’ll get a professional, lasting finish you can be proud of.
How to Prepare Your Cabinets for Painting
Are you ready to guarantee your cabinet painting project turns out flawlessly? Start by removing cabinet hardware, like handles and knobs, to avoid paint drips and get a smooth finish.
Clean all surfaces thoroughly with a degreaser or soapy water to eliminate grease, dirt, and residue. Lightly sand the cabinets to create a rough surface that helps the paint stick better. Wipe away dust with a tack cloth.
When it comes to choosing a paint color, pick a hue that complements your space and lighting. If you’re unsure, test a small area first. Before painting, tape off edges and any areas you want to keep clean.
This prep work minimizes mistakes and helps you achieve professional-looking results. Proper preparation not only makes the finish more durable but also makes the painting process smoother and more enjoyable.
Step-by-Step Guide to Painting Kitchen Cabinets

Now that your cabinets are prepped and ready, it’s time to start painting. Follow these steps for a flawless finish:
- Choose the right paint that matches your overall color scheme. Go for high-quality, semi-gloss or satin finishes for durability.
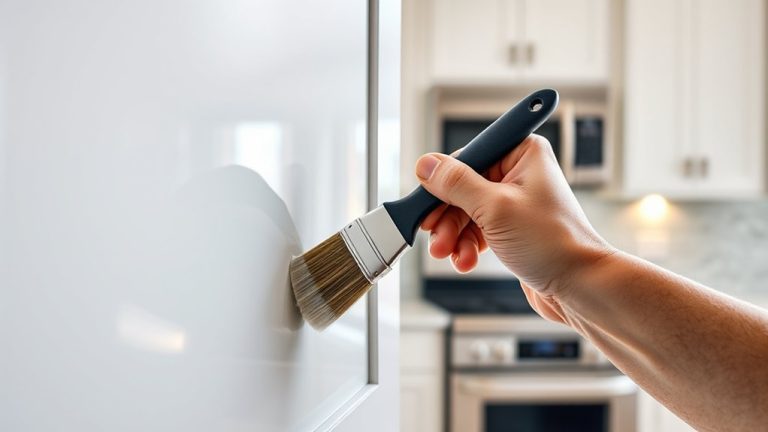
- Apply the first coat with a brush or roller, using smooth, even strokes along the grain. Let it dry completely before moving on.
- Sand lightly between coats to keep the surface smooth. Then, clean off any dust before applying the next layer.
- Reattach cabinet hardware carefully once the final coat is dry. Or, consider updating your hardware to give your cabinets an extra touch of style. Just make sure everything is aligned properly.
Tips for Achieving a Smooth, Professional Look
Achieving a smooth, professional look depends on careful technique and attention to detail throughout the painting process. Start by choosing a color scheme that complements your kitchen’s overall design. This helps ensure good color coordination and a cohesive look.
When selecting paint, go for high-quality products that give a smooth finish and are durable. Before painting, properly sand and clean your cabinets to remove imperfections and help the paint stick better.
Use a high-quality brush or roller to apply the paint in thin, even coats. This helps avoid drips and streaks. Be patient and let each coat dry completely before adding the next one.
Pay attention to your hardware. Updating or replacing handles and knobs with modern, matching pieces makes your cabinets look more polished. Removing hardware during painting and reattaching it afterward results in cleaner lines and a more professional finish.
Following these tips will help you achieve a flawless, professional look that enhances your kitchen’s style.
Common Mistakes When Painting Cabinets: And How to Avoid Them
Painting cabinets might seem easy, but common mistakes can ruin your project and end up costing you time and money. To keep things smooth, watch out for these pitfalls.
First, don’t skip surface prep. Skipping sanding or cleaning can lead to uneven paint and peeling down the line. Taking the time to prep makes a big difference.
Next, pay attention to color choices. Picking colors that clash or don’t match your decor can make the room look off. Choose hues that complement your overall style.
Budget wisely too. Using cheap paint or tools might save money upfront, but it will likely result in a finish that doesn’t last and could cost more later. Invest in good quality supplies.
Finally, don’t rush through the job. Applying too few coats or skipping drying time can cause streaks and uneven coverage. Patience is key for a professional look.
How to Maintain and Touch Up Your Painted Cabinets
Keeping your cabinets looking fresh is all about regular cleaning with gentle methods. Just a quick wipe now and then with a soft cloth and mild cleaner can make a big difference. If you notice any chips or scratches popping up, don’t wait too long—doing a quick touch-up with paint can prevent those small issues from turning into bigger problems.
And don’t forget about sealing! Applying a good sealant helps protect the finish and keeps your cabinets looking new longer. To really extend their life, it’s best to avoid harsh cleaners and abrasive scrubbers. Stick to soft cloths and gentle cleaning solutions, and your cabinets will stay looking great for years to come.
Regular Cleaning Techniques
Regular cleaning is key to keeping your painted cabinets looking fresh and preventing dirt and grease from building up. Having a routine makes it easier to keep them spotless and helps them last longer. Just follow these simple steps:
Create a cleaning schedule, like weekly or biweekly, to stay consistent. Use a soft cloth or sponge with mild dish soap and warm water for regular dust and grime.
For stains, gently apply a mixture of baking soda and water or a gentle cleaner, then wipe it clean. Avoid harsh chemicals or abrasive scrubbers that can damage the paint finish.
Touch-Up Painting Tips
When you notice small chips or scratches on your painted cabinets, addressing them promptly can prevent more damage and keep your kitchen looking fresh. Start by cleaning the area with a gentle wipe to remove grease or dust.
Use a small brush or touch-up pen that matches your cabinet color for precise application. For the best results, consider color coordination when selecting touch-up paints to ensure seamless blending.
If your cabinets have hardware, check if removing or adjusting it makes touch-ups easier. After applying the touch-up paint, let it dry completely before reattaching hardware or cleaning the surface.
Regularly inspect your cabinets and keep a small container of the original paint for quick repairs. This helps maintain a consistent, flawless finish over time.
Preventative Maintenance Measures
Maintaining the fresh look of your painted cabinets requires proactive care to prevent damage before it starts. Regularly check and tighten cabinet hardware to avoid unnecessary wear and looseness. Keep the paint color in mind and steer clear of harsh cleaners that can strip or dull the finish.
To keep your cabinets looking their best, follow these simple steps:
- Clean with a soft, damp cloth and mild soap regularly.
- Use gentle touch-ups with matching paint for scratches or chips.
- Avoid heavy or abrasive cleaning tools that can damage the paint.
- Refinish or add protective topcoats periodically to preserve the paint’s integrity.
Frequently Asked Questions About Kitchen Cabinet Painting
Are you wondering what it really takes to successfully paint your kitchen cabinets? One common question is how to choose the right paint color. When considering color coordination, think about your overall kitchen palette and how new cabinet colors will complement your walls, countertops, and backsplash.
Choosing the right paint color depends on your kitchen palette and how it complements walls, countertops, and backsplash.
Light shades can brighten the space, while darker hues add sophistication. Another key concern is hardware selection. Updating knobs and pulls can completely transform your cabinets’ look and feel. Make sure your hardware style and finish match your new paint to create a cohesive design.
Many people wonder about the best paint types for durability and finish. A high-quality, semi-gloss or satin paint often works best for kitchens. Finally, don’t forget to prep your cabinets properly, including cleaning and sanding, to ensure a smooth, lasting finish.
With the right choices, your painted cabinets will look flawless and revitalized.
Frequently Asked Questions
How Long Does a Painted Cabinet Finish Typically Last?
A painted cabinet finish usually lasts about 5 to 10 years, depending on factors like color choices and how durable the finish is.
If you pick high-quality paint with a tough finish, it can resist chipping and wear for longer. Regular cleaning and avoiding harsh chemicals help keep it looking good.
For the best lifespan, go for finishes made specifically for kitchens. This way, your cabinets stay vibrant and protected over time.
Can I Paint Over Existing Stained Cabinets?
You can definitely paint over stained cabinets, transforming them from dull to dazzling in no time! First, you’ll want to prep by cleaning and lightly sanding the surface to ensure paint adhesion.
Consider choosing a primer designed for stained wood. Once prepped, examine a variety of paint color options to match your style. With the right technique, your cabinets will look like they were custom-made, not just painted over.
Is It Necessary to Remove All Hardware Before Painting?
Yes, you should remove all hardware before painting. Removing hardware makes surface preparation easier because you can thoroughly clean and sand the cabinets without any obstructions.
It also helps prevent paint from getting on handles or knobs, giving you a cleaner, more professional look. Plus, taking off hardware reduces the risk of accidental damage during the painting process.
Once you’re done painting, you can reattach the hardware for a polished, flawless finish.
What Is the Best Way to Clean Cabinets Before Painting?
To guarantee a flawless finish, you need to master surface preparation. First, do a thorough cabinet cleaning using a mixture of mild dish soap and warm water or a degreaser.
Focus on removing grease, dirt, and grime. Rinse with clean water and dry completely. This step is vital because proper cabinet cleaning ensures the best paint adhesion.
Skipping this can lead to peeling or chipping later on. Your perfect finish really depends on it.
How Do I Prevent Paint Chipping Over Time?
To prevent paint chipping over time, focus on proper surface preparation and choosing a durable paint. Make sure to clean and sand the cabinets thoroughly before painting so the paint has a smooth surface to stick to.
Use high-quality, durable paint designed for kitchens. It’s better to apply multiple thin coats rather than one thick layer for better adhesion and longevity.
Finally, seal your paint with a protective topcoat. This adds extra durability and helps keep your finish looking fresh longer.
Conclusion
By choosing the right paint and preparing carefully, you’ll enhance your kitchen’s look with a touch of elegance. Taking your time and paying attention to details makes a big difference.
Patience and careful work will give you a finish that looks beautiful and lasts long. Remember, achieving a flawless kitchen cabinet paint job is about gentle persistence and using quality products.
This way, your cabinets will quietly showcase style and care, making your space feel fresh and refined for years to come.