
10 Simple Steps to Make Kitchen Sink Cookies
Many home bakers find themselves overwhelmed when trying to make the perfect kitchen sink cookies. You’re not alone—getting that delicious, chewy cookie with all your favorite mix-ins can feel tricky. But don’t worry, with a few simple steps, you’ll be able to whip up a batch of irresistible cookies in no time.
To make kitchen sink cookies, start by gathering ingredients like butter, sugars, and your favorite mix-ins such as candies, nuts, or dried fruits. Choose the right equipment, like a sturdy baking sheet and mixing bowls.
Cream the butter and sugars until fluffy, then fold in your add-ins. Bake at around 350°F until golden, then cool on a wire rack.
For tips on customizing and fixing common issues, delve into these steps further for delicious, personalized treats.
Key Takeaways
- Gather a variety of mix-ins like candies, nuts, dried fruits, and chocolate chips for a true kitchen sink experience.
- Cream softened butter with sugars until light and fluffy, then mix in eggs and vanilla.
- Combine dry ingredients and fold into the wet mixture, then evenly incorporate your chosen mix-ins.
- Portion the dough onto a prepared baking sheet, spacing evenly so they bake uniformly.
- Bake at 350°F until the edges turn golden, then cool on a wire rack before storing.
What Are Kitchen Sink Cookies?
Kitchen sink cookies are a type of dessert that lets you toss in almost any leftover ingredients you have on hand. The origins of these cookies aren’t exact, but they’ve become popular as a fun, flexible baking project.
Basically, they’re a creative way to use up bits of candy, dried fruit, nuts, or chocolate chips. The idea is to mix all your “kitchen sink” ingredients into a cookie dough, creating a unique treat every time.
Create delicious, one-of-a-kind cookies by mixing up your leftover candies, dried fruits, nuts, and chocolate chips.
You can experiment with different flavors and textures, making each batch special. Unique ingredient ideas include pretzels, shredded coconut, mini marshmallows, or even cereal.
The appeal is in their versatility, letting you clear out pantry clutter while baking something delicious. Kitchen sink cookies are perfect for customizing to your tastes and what’s available.
They make baking both fun and resourceful. These cookies encourage creativity and help you make the most of what you have on hand.
Gather Ingredients and Tools for Your Kitchen Sink Cookies
Before you start mixing your leftover ingredients, it’s important to gather everything you’ll need. Planning your ingredients and tools ensures a smooth baking process, especially if your kitchen design emphasizes efficiency. Think of your workspace as a hub where everything is within reach.
For your kitchen sink cookies, gather a mixing bowl, measuring cups, and spoons. Also, grab a spatula and baking sheet. Don’t forget to collect your leftover candies, nuts, dried fruits, or chocolate chips.
Having these tools ready helps you work quickly and prevents missing essential ingredients. Remember, ingredient substitutions can add variety—use honey instead of syrup or oats instead of flour if needed.
Keep your workspace organized, and make sure your tools are clean and accessible. This preparation step makes baking more enjoyable and efficient, setting a solid foundation for your delicious kitchen sink cookies.
Choose the Right Baking Equipment

Choosing the right baking equipment is essential to guarantee your cookies turn out perfectly. Start with a sturdy baking sheet that provides even heat distribution, preventing burnt edges and undercooked centers.
A rimmed baking sheet is ideal because it keeps the cookies contained and prevents spills. Select durable, heat-safe mixing bowls in various sizes to make your prep easier; these will hold your ingredients and allow for thorough mixing without mess.
Non-slip bottoms on bowls can help keep them steady during stirring. Make sure your baking sheet is compatible with your oven’s size and can handle the batter’s quantity.
Using the right equipment helps you achieve consistent results, from evenly baked cookies to proper ingredient mixing. Investing in quality tools ensures your baking process runs smoothly and efficiently, making your kitchen sink cookies not only delicious but also easy to prepare.
Cream Butter and Sugars for a Perfect Cookie Base
To get that perfect cookie base, you really want to cream the butter and sugars together until they’re nice and light and fluffy. It’s best to use room temperature ingredients because they blend together more smoothly, making the mixture even. When you do it right, this step helps give your cookies that tender, airy texture everyone loves.
Importance of Proper Creaming
Proper creaming is essential because it creates a smooth, airy mixture that forms the base of your cookie dough. When you beat butter and sugars together thoroughly, you add air, which makes the dough light and fluffy.
This step also influences how your cookies hold their shape and how they bake. To get the best results, look for a pale, creamy color and increased volume.
Visualize the process to help you get there: picture a cloud-like consistency that’s soft but firm. Imagine the sugars dissolving into the butter, creating a silky base.
Think of the dough as being ready for decorating, with a solid foundation for toppings or decorations. Once you’ve achieved proper creaming, store your dough properly to keep it from drying out.
This makes your cookies easier to shape and decorate later. Proper creaming helps ensure your cookies turn out consistent and delicious every time.
Using Room Temperature Ingredients
Using room temperature ingredients is key to getting a smooth, evenly creamed mixture. When butter and sugars are at the right temperature, they blend more easily, creating a uniform base that helps your cookies turn out perfect.
If your butter is too cold, it won’t mix well, and your dough might end up lumpy. To avoid this, take butter out of the fridge about 30 minutes before baking or soften it in short bursts in the microwave.
For ingredient substitutions, softened margarine works as a good alternative. Just avoid melted butter, as it can mess with the proper texture.
Store your ingredients properly—keep butter in the fridge and take it out in advance—so you’re always ready to start baking. Properly tempered ingredients really make a difference in your cookie’s consistency and flavor.
Achieving Fluffy Texture
Once your ingredients are at the right temperature, the next step is to create a light, fluffy base for your cookies. To do this, you’ll need to thoroughly cream the butter and sugars.
This step adds air to the mixture, which is key to getting that fluffy texture and enhancing the flavor of your cookies. Use a mixer on medium speed and beat until the mixture is pale and creamy, about 2-3 minutes.
Imagine the mixture turning silky, almost like whipped cream. Properly creamed butter and sugars set the foundation for soft, tender cookies.
Keep in mind, good baking techniques here really make a difference. Think of this step as building the base for a perfect treat, where air pockets make your cookies light and chewy.
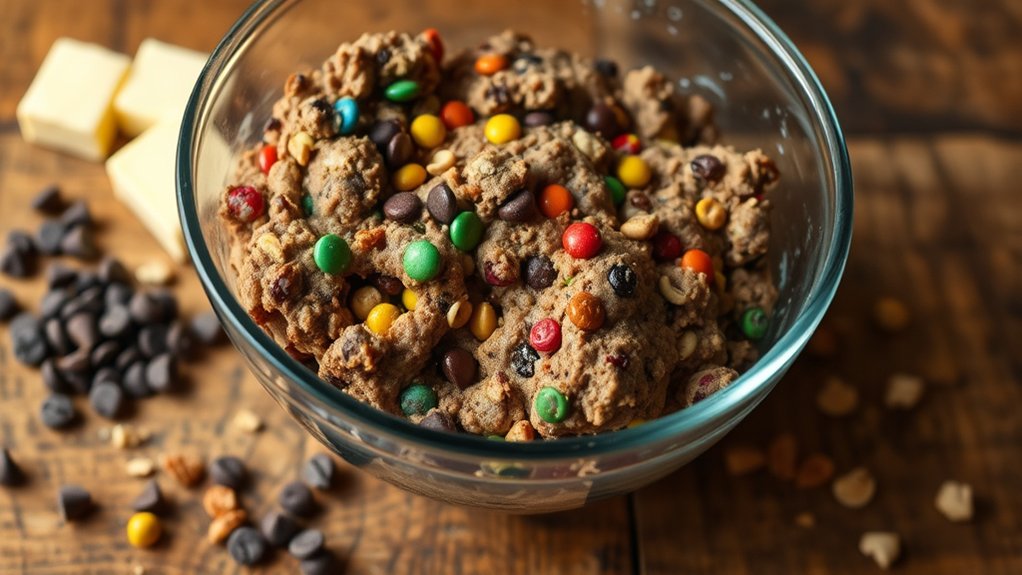
Mix in Your Favorite Add-ins and Sink Goodies
After mixing the basic cookie dough, it’s time to add your favorite extras to make each batch unique. This is your chance to experiment with flavor combinations and customize your cookies to your taste. Think beyond traditional chocolate chips; consider mixing in chopped nuts, dried fruits, or even candy pieces.
You can also swap ingredients to suit your preferences or dietary needs—use vegan chocolate or gluten-free oats if needed. When choosing add-ins, try to balance flavors so they complement each other. For example, salty pretzels pair well with sweet caramel bits, while coconut adds a tropical twist.
Don’t be afraid to get creative—combine different textures and flavors to enhance your kitchen sink cookies. The key is to mix evenly so every bite has a delicious surprise. By customizing your add-ins, you make each batch truly your own, turning a simple cookie into a personalized treat.
Form and Portion Your Cookie Dough
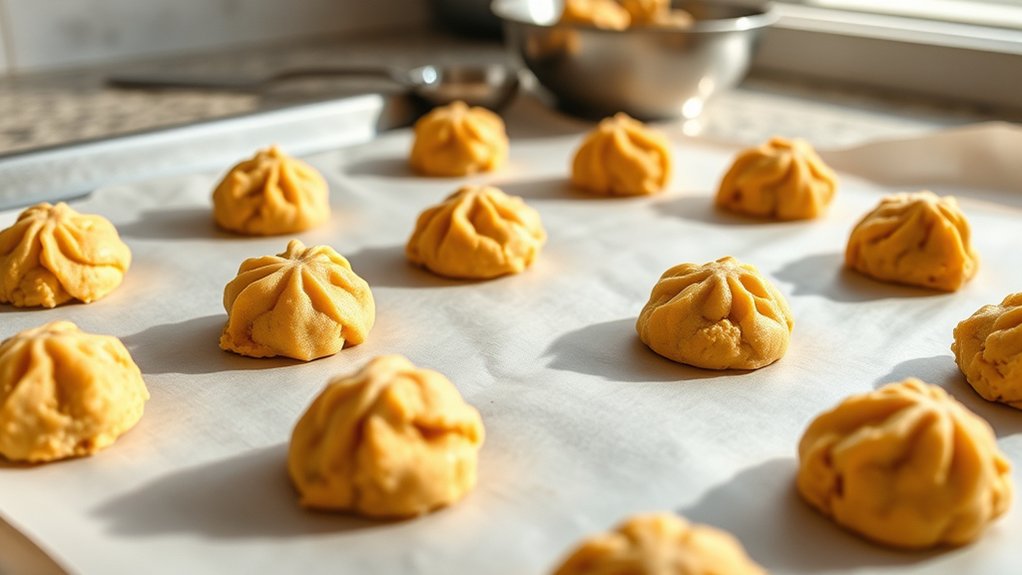
Before you start shaping your cookies, it’s important to portion the dough evenly to ensure they bake uniformly. Proper sizing helps each cookie cook through at the same rate, so you won’t end up with undercooked centers or burnt edges.
Check the dough’s consistency; it should be firm enough to hold its shape but not too sticky. To portion, use a cookie scoop or tablespoon to measure out equal amounts. This keeps everything consistent in size and baking time.
Once you’ve measured out the dough, gently roll each piece into a ball, keeping your hands clean and dry. Visualize the process with these simple steps:
- Measure out dough with a scoop or spoon for consistent size
- Roll the dough into smooth, round balls
- Place evenly spaced on the baking sheet, ready for shaping or flattening
This method helps you make evenly sized cookies, making your baking smoother and your results even more delightful.
Bake at the Right Temperature and Time
First things first, make sure your oven is set to the perfect baking temperature. This helps your cookies cook evenly and turn out just right. It’s a good idea to double-check your oven’s actual temperature with an oven thermometer if you have one—that way, you’re not just trusting the dial.
And don’t forget to keep an eye on the baking time. Every oven is a little different, and the size of your cookies can also affect how long they need in the oven. So, start checking a minute or two before the timer goes off, and adjust if needed. That way, you’ll get cookies that are baked to perfection—not overdone or undercooked.
Optimal Baking Temperature
Getting the temperature just right is essential for baking perfect kitchen sink cookies. If the oven’s too hot, your cookies may burn or become overly crisp; too low, and they might stay undercooked or spread too much.
To guarantee even baking, set your oven to the recommended temperature, usually around 350°F (175°C). Visualize your cookies turning golden brown, with edges crisp and centers soft.
Remember, ingredient substitutions like using brown sugar or adding oats can affect baking time, so adjust accordingly. Proper storage tips include letting cookies cool completely before storing in an airtight container to maintain freshness.
Keeping your oven calibrated and monitoring baking times will help you achieve consistent, delicious results every time.
Precise Cooking Duration
Achieving perfectly baked kitchen sink cookies depends heavily on timing; even a few extra minutes can turn soft centers into hard, overdone treats. To master this, use precise cooking techniques like setting a timer and checking for doneness around the recommended time.
Keep in mind that ingredient substitutions, such as swapping butter for margarine or adjusting sugar levels, may affect baking time slightly. If your dough is denser or wetter, you might need to add a minute or two.
Conversely, if your cookies appear golden early, remove them sooner. Always observe the edges—when they turn a light golden brown, it’s a sign they’re ready.
Adjust your baking duration as needed, and remember, consistency is key for perfect results every time.
Cool and Handle Your Cookies Properly
Have you ever wondered why some cookies stay soft and chewy while others turn hard and crunchy? The secret is in how you cool and handle them.
Once your cookies are out of the oven, let them cool on a wire rack. This helps prevent sogginess and keeps their texture just right.
Proper storage is key. Keep cookies in an airtight container, separating layers with parchment paper to avoid sticking and crushing.
For presentation, arrange your cookies neatly on a plate or tray to show off their look. When handling, use a gentle touch to prevent breaking or deforming them.
Imagine carefully placing each cookie on a wire rack without pressing down. Or using a spatula to lift cookies without crumbling.
Keep cookies in a well-ventilated container to maintain their freshness.
This way, your cookies stay perfect, appealing, and deliciously soft or crispy, just as you want them.
Creative Variations to Customize Your Kitchen Sink Cookies
One of the best ways to make your kitchen sink cookies truly stand out is by experimenting with creative variations. Mix up flavor combinations like adding toasted coconut, chopped nuts, or dried fruit for distinctive tastes.
Consider incorporating unexpected ingredients such as crushed pretzels, candies, or even a swirl of caramel or peanut butter to add depth.
Presentation tips can really boost your cookies’ appeal. Try stacking them with colorful frosting or drizzling melted chocolate on top for a professional look.
Using contrasting colors and textures also draws attention and makes each cookie visually interesting.
You can even personalize your cookies by adding themed decorations or edible glitter for special occasions.
Remember, the goal is to showcase your creativity, so don’t be afraid to try new flavor combos or presentation techniques.
These small tweaks will make your kitchen sink cookies memorable and truly yours.
Troubleshoot Common Baking Problems
Even with careful experimentation and presentation, baking problems can still crop up and affect your kitchen sink cookies. If your cookies turn out flat, dense, or uneven, don’t worry—most issues have simple fixes.
To improve flavor combinations and presentation tips, start by adjusting ingredient ratios. For example, if cookies spread too much, chill the dough before baking or reduce butter slightly.
If they’re too dry or crumbly, add a touch more moisture or eggs. For uneven baking, make sure your oven temperature is accurate with an oven thermometer.
Common issues include cookies that are too crispy or underbaked, which can be fixed by adjusting baking time. Keep an eye on your oven’s heat and rotate trays for even baking.
Frequently Asked Questions
Can I Make Kitchen Sink Cookies Gluten-Free?
Yes, you can make kitchen sink cookies gluten-free. Just swap out the regular flour for a gluten-free version that has a similar texture.
You might also want to try using alternative sweeteners like honey or maple syrup to match your taste preferences.
Keep in mind that gluten-free flours can act a bit differently, so you might need to adjust the amount slightly or add a binder like xanthan gum for the best results.
How Long Do Kitchen Sink Cookies Stay Fresh?
Kitchen sink cookies typically stay fresh for about 3 to 5 days when stored properly.
Did you know that properly storing baked goods can extend their shelf life by up to a week? To keep your cookies delicious, store them in an airtight container at room temperature.
For longer freshness, you can freeze them. Follow these storage tips to enjoy your cookies at their best for as long as possible.
Can I Freeze Cookie Dough for Later Baking?
Yes, you can freeze cookie dough for later baking. Just shape the dough into logs or discs, then wrap them tightly in plastic wrap. Place the wrapped dough in an airtight container or freezer bag.
This method keeps your cookie dough fresh for up to three months. When you’re ready to bake, you can either thaw the dough slightly or bake directly from frozen for fresh, homemade cookies anytime.
What Are Some Healthy Alternatives for Add-Ins?
Did you know that adding nuts and natural sweeteners can boost your cookie’s health?
For a tasty, healthy alternative, choose healthy nuts like almonds or walnuts—they add crunch and nutrients. Swap out processed sugars for natural sweeteners like honey or maple syrup, which provide sweetness without the crash.
These simple swaps make your kitchen sink cookies more nutritious, satisfying your sweet tooth while supporting your wellness goals.
How Do I Store Leftover Kitchen Sink Cookies?
To store leftover kitchen sink cookies, put them in an airtight container to keep them fresh. Make sure they’re fully cooled before sealing to avoid moisture getting in.
For longer storage, you can freeze the cookies in a single layer, then transfer them to a resealable bag. When you’re ready to eat, just let them thaw at room temperature or warm them up a bit in the microwave for that just-baked feel.
Conclusion
Now that you know the simple steps to create your perfect kitchen sink cookies, it’s time to get baking, gather your ingredients, and start mixing.
Baking is all about having fun, so welcome the chaos of your favorite add-ins, celebrate the variety of textures, and enjoy the delicious mess.
With patience and a touch of creativity, you’ll turn basic ingredients into a delightful masterpiece.
Transform everyday baking into an exciting adventure—one cookie at a time—by making these delicious kitchen sink cookies your own.