
What Makes a Unique Kitchen Sink Cookie?
Many home bakers find themselves stuck in a cookie rut, craving something exciting but unsure where to start. You’re not alone—trying to create cookies that wow can feel overwhelming.
A unique kitchen sink cookie stands out by combining unexpected ingredients like candies, dried fruits, spices, or savory elements for a complex flavor. You balance contrasting textures—crunchy, chewy, and soft—and add vibrant mix-ins and colorful toppings to make it visually appealing.
Creative flavor pairings and thoughtful layering transform these cookies into memorable treats. If you want ideas for customizing and perfecting your own, there’s plenty more to explore.
Key Takeaways
- Incorporate unexpected and diverse mix-ins like nuts, candies, dried fruits, or seasonal ingredients for added flavor and texture.
- Balance contrasting textures such as crunchy, chewy, and soft, along with vibrant colors to create visual appeal and sensory interest.
- Experiment with flavor combinations like spicy, salty, or citrus elements to add depth and make your cookies truly unique.
- Use creative presentation techniques with colorful toppings, garnishes, and attractive plating to enhance visual impact.
- Customize recipes to suit dietary needs or personal preferences, including ingredient substitutions and texture enhancements.
What Makes a Kitchen Sink Cookie Unique and Delicious

What makes a kitchen sink cookie truly unique and delicious is its ability to combine a variety of unexpected ingredients into one irresistible treat. This starts with smart ingredient pairing—balancing sweet, salty, crunchy, and chewy elements to create complex flavors.
For example, mixing chocolate chips with pretzels or dried fruit with nuts adds contrast that excites the palate. Mastering baking techniques is just as important; you want to fold ingredients gently to maintain texture and ensure even baking.
Using the right oven temperature and baking time guarantees a perfect cookie—crispy edges and a soft center. Moreover, layering flavors through ingredient pairing amplifies the cookie’s appeal, making each bite a delightful surprise.
The key is experimenting with combinations that complement one another, resulting in a cookie that’s both familiar and novel. With the right approach to ingredient pairing and baking techniques, your kitchen sink cookies will stand out as bold, satisfying treats.
How the Mix-Ins Create Endless Cookie Variations
When you start mixing different ingredients, the possibilities for cookie flavors are practically endless. You can try out all sorts of combinations to keep things exciting every time you bake. Adding nuts, candies, or dried fruits isn’t just about flavor—they also bring in new textures that make each bite interesting and fun to eat.
And let’s not forget about the visual appeal! Colorful mix-ins can really make your cookies pop, turning them into little works of art. It’s almost like creating a mini feast for your eyes as well as your taste buds.
Flavor Combinations Expand
The variety of mix-ins you can add to your kitchen sink cookies is practically limitless, turning a simple treat into a canvas for endless flavor combinations. You can experiment with seasonal ingredients like pumpkin, cranberries, or peppermint to match any holiday or time of year.
Ingredient substitutions offer even more flexibility, allowing you to swap chocolate chips for white chocolate or nuts for dried fruit, customizing each batch.
To inspire your creativity, consider these options: fresh or dried fruits for natural sweetness, nuts, seeds, or granola for crunch and texture, and spices or extracts to amplify or complement flavors.
Texture Variations Achieved
Adding different mix-ins to your kitchen sink cookies instantly changes their texture, giving each batch a unique mouthfeel. Incorporate ingredients like nuts, dried fruit, or toffee bits to create crunch, chewiness, or gooeyness.
These variations keep every cookie interesting and boost the overall experience. Presentation tips include arranging cookies with contrasting textures to highlight their differences visually.
When storing, use airtight containers to preserve the diverse textures. Crisp cookies stay crunchy, while softer ones remain tender. Layering mix-ins thoughtfully prevents them from sinking or clumping, maintaining the intended mouthfeel.
Play with combinations and textures to craft cookies that surprise with every bite. This makes them truly memorable. Your attention to texture will turn simple cookies into a versatile, crave-worthy treat.
Visual Appeal Enhanced
Incorporating a variety of mix-ins instantly boosts the visual appeal of your cookies, making each batch look distinctively enticing. The key is balancing ingredient colors and textures to create eye-catching contrast. When you add different mix-ins, you introduce vibrant color contrast that draws the eye and makes each cookie unique.
Consider these elements:
- Combining dark chocolate chips with bright candied fruit for lively contrast
- Mixing nuts and white chocolate for a balanced, textured look
- Using colorful sprinkles or dried fruit to add pops of color
Balancing Flavors and Textures for the Perfect Cookie
Achieving the perfect cookie requires a careful balance of flavors and textures that complement each other harmoniously. Start with ingredient pairing; combining sweet, salty, tangy, or spicy elements creates depth and interest. For example, pairing rich chocolate with a pinch of sea salt elevates both flavors.
Texture contrast is just as vital—mixing chewy, crunchy, and soft components keeps each bite engaging. Incorporate nuts or crisp candies for crunch, while soft baked bits or gooey centers add tenderness. Be mindful not to overload with too many ingredients, which can muddle flavors and make the cookie overly dense.
Instead, select a few complementary ingredients that highlight each other’s qualities. Achieving this balance ensures your cookie isn’t just flavorful but also satisfying in every bite. When flavors and textures harmonize, your kitchen sink cookie becomes a memorable treat that excites the senses.
Creative Ways to Incorporate Surprising Ingredients
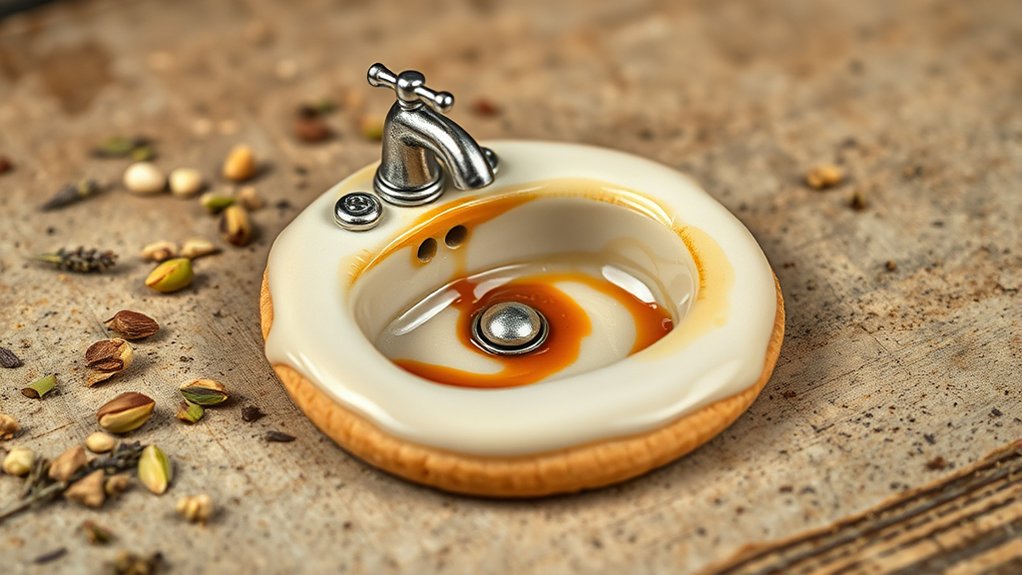
Want to really surprise your taste buds? Why not experiment with unexpected flavor combos, like spicy chili paired with sweet, rich chocolate? It’s a little daring, but the result can be totally delicious and memorable.
And don’t be afraid to get creative with your ingredients, too. Toss in some toasted herbs or a bit of savory cheese into your cookie dough—you might just create a whole new favorite treat.
Once you’ve got your cookies baked, finishing them off with a fun and creative presentation can really make them shine. Think about serving them on unique platters or adding colorful toppings to make each one stand out. It’s all about making your baking not just tasty, but visually exciting as well!
Unexpected Flavor Combinations
Sometimes, the best cookies surprise your taste buds when unexpected ingredients come into play. You can experiment with flavor combinations like spice infusion, adding a hint of cinnamon or cardamom to create warmth and depth. Fruit infusion, on the other hand, introduces a revitalizing twist, like mashed berries or citrus zest, elevating the cookie’s profile.
To make your cookies stand out, consider these creative ideas:
- Mix in chopped dried apricots or cranberries for a tangy burst
- Add a touch of ginger or turmeric for a spicy kick
- Incorporate lemon or orange zest for bright, citrusy notes
These unexpected flavor combos turn a simple kitchen sink cookie into a unique culinary adventure, keeping each bite exciting and memorable.
Unusual Mix-ins and Additions
To truly elevate your kitchen sink cookies, try adding unusual mix-ins that surprise the palate. Finding unique ingredients is key—think toasted sesame seeds, chopped dried fruits, or even savory bits like crispy bacon.
These extras create interesting textures and flavors that make your cookies stand out from the ordinary. When adding these ingredients, tweak your baking techniques a bit; fold delicate items gently to avoid breaking them or adjust baking times for moisture-rich components.
Experimenting is the name of the game. Pair sweet with savory or spicy for an exciting twist. By choosing creative ingredients and refining your methods, you’ll make cookies that taste extraordinary and show off your baking daring.
Creative Presentation Ideas
Adding surprising ingredients to your cookies isn’t just about flavor. It’s also about presentation. To really wow your guests, focus on creative plating and color contrast. Bright, unexpected toppings can turn a simple cookie into a visual treat.
Try adding vibrant fruit preserves or edible flowers for eye-catching appeal. You can also incorporate contrasting colors, like dark chocolate chips with white icing, to make each element pop. Consider these ideas:
- Use contrasting colors for toppings and drizzles to boost visual impact.
- Plate cookies on sleek, minimalist dishes to highlight their uniqueness.
- Garnish with edible gold or colorful sprinkles for a luxe touch.
These techniques make your cookies memorable and let your creativity shine through visual storytelling.
Tips for Customizing Your Kitchen Sink Cookie to Your Tastes

Customizing your kitchen sink cookie to match your tastes starts with choosing the right mix-ins. Think about what brings you sweet nostalgia—maybe childhood candies or favorite nuts—that will add a personal touch. To guarantee flavor harmony, select ingredients that complement each other, like caramel bits with sea salt or dark chocolate with dried cherries.
Don’t be afraid to experiment with textures too—adding chewy dried fruit or crunchy pretzels can enhance your cookie experience. If you love bold flavors, incorporate spices like cinnamon or ginger; for a milder taste, stick to classic chocolate chips or vanilla extract.
How to Make Your Cookies Look as Good as They Taste
A beautifully presented cookie can elevate your baking from just delicious to truly irresistible. To make your cookies look as good as they taste, focus on presentation and storage.
A stunning presentation transforms cookies from tasty to irresistible with thoughtful styling and smart storage.
A good kitchen setup makes a big difference—you want your workspace organized and visually pleasing, which makes decorating easier. Use vibrant icing, sprinkles, or edible decorations to add visual appeal.
Try stacking or arranging cookies creatively on a stylish plate or tray to enhance their overall look. Proper storage keeps cookies fresh and helps maintain their appearance.
Keep cookies in airtight containers to prevent smudging or crushing delicate decorations. Remember these tips:
- Choose an attractive, matching cookie jar or display tray
- Decorate with contrasting colors to make details pop
- Keep cookies in a cool, dry spot to preserve their shine and texture
Common Mistakes When Baking Kitchen Sink Cookies: And How to Avoid Them
One common mistake people make is overloading their cookie mix. When you add too many ingredients, the cookies can spread out too much or turn out to be really dense. It’s best to stick to the recipe and measure everything carefully to get the right texture and flavor.
Another thing to watch out for is inconsistent ingredient ratios. If you don’t measure properly, your cookies might turn out either too crumbly or too chewy, which can be disappointing. Taking your time to measure everything accurately really makes a difference.
And don’t forget about baking times! Baking your cookies for too long or not long enough can lead to cookies that are either undercooked and gooey or burnt and hard. Setting a timer helps you keep track so you get that perfect, delicious cookie every time.
Overloading Cookie Mix
Overloading your cookie mix is a common mistake that can cause cookies to spread too much or turn out dense and unevenly baked.
Adding too many ingredients, like extra chocolate chips or nuts, can overwhelm the dough’s structure. This can lead to cookies that are either flat and crispy or doughy and undercooked.
To avoid this, measure your ingredients carefully and stick to a balanced ratio. Be mindful not to pack in too many mix-ins, which can mess with the batter’s consistency.
Keep your mix-ins evenly distributed and don’t overload beyond what the recipe suggests. Remember, moderation is key to getting the perfect texture and flavor in your cookies.
Too many ingredients can really sabotage your baking success.
Inconsistent Ingredient Ratios
When ingredient ratios are off, your kitchen sink cookies can turn out unevenly or lose their intended texture. An improper ingredient balance can cause cookies to be too dense, crumbly, or greasy.
If you add too much butter or sugar, it throws off flavor harmony and affects how the cookie bakes. Conversely, too little of certain ingredients can make them dry or bland.
To guarantee this, measure carefully and stick to your recipe’s proportions. Adjustments should be made gradually, testing small batches if needed.
Achieving the right ingredient balance ensures your cookies have the perfect texture and flavor harmony. Consistency in your ingredients helps you create a unique, delicious kitchen sink cookie every time.
Improper Baking Times
Even if your ingredient ratios are spot-on, baking times can make or break your kitchen sink cookies. Baking temperature and cooling time are key for perfect results. Overbaking can leave your cookies dry and hard, while underbaking makes them gooey and underdone.
To avoid this, keep an eye on your oven’s temperature and set a timer. Don’t skip the cooling time either, as it helps the cookies set properly. Watch out for these common mistakes:
- Baking at too high or too low a temperature
- Removing cookies before they are fully cooled
- Relying only on time without checking for doneness
Adjust your baking temperature, follow the recommended times, and always let your cookies cool completely for the best texture and flavor.
Adjusting Recipes for Dietary Restrictions and Preferences
Adjusting recipes to suit dietary restrictions and preferences allows you to enjoy your favorite treats without compromising your health or values. You can do this through nutritional modifications and ingredient substitutes.
For example, swap out white flour for almond or coconut flour to reduce carbs or add extra fiber. If you’re dairy-free, replace butter with coconut oil or dairy-free margarine.
For those avoiding sugar, use natural sweeteners like honey, maple syrup, or stevia. These ingredient substitutes help tailor recipes to your needs without sacrificing flavor.
Keep in mind, some adjustments may require slight recipe tweaks, such as reducing liquids or increasing binders. By thoughtfully making these modifications, you guarantee your kitchen sink cookies stay delicious while aligning with your dietary goals.
This approach empowers you to create treats that are both satisfying and health-conscious, making your baking experience more personalized and inclusive.
Inspiring Variations to Elevate Your Kitchen Sink Cookies
To truly uplift your kitchen sink cookies, experiment with creative variations that add new textures and flavors. Think beyond traditional ingredients—try mixing in unexpected elements that complement your kitchen decor and baking tools.
For example, adding toasted coconut provides a chewy, tropical twist, while chopped candied ginger offers a spicy kick. Incorporating different nuts, like pistachios or macadamia, enriches crunch and richness.
You can also experiment with flavor infusions, such as swirls of caramel or berry jam. These variations not only enhance the taste but make your cookies visually appealing, fitting seamlessly into your kitchen decor.
Using versatile baking tools like cookie scoops or decorative molds can help shape these creative ideas into beautiful treats. By playing with textures and flavors, you’ll craft unique cookies that surprise and delight every time, making your baking experience both fun and inspiring.
Final Tips for Baking and Enjoying Your Ultimate Kitchen Sink Cookie
Once you’ve experimented with different ingredients and techniques to create your perfect kitchen sink cookies, it’s time to focus on the finishing touches that make sure they turn out just right. Using fresh ingredients boosts both flavor and texture, so sourcing high-quality items is key.
Make sure to use reliable baking equipment like a good mixing bowl, silicone spatula, and oven thermometer. This helps you get consistent results every time you bake. Before popping your cookies in the oven, chill the dough if needed. This helps prevent spreading and boosts flavor development.
After baking, let your cookies cool on a wire rack. This keeps their texture just right—crisp edges with soft centers. To really enjoy your ultimate kitchen sink cookie, pair it with a glass of milk or your favorite coffee.
Here’s a quick guide to help you make the most of your baking process:
| Tip | Benefit |
|---|---|
| Use fresh ingredients | Better flavor and texture |
| Accurate oven temp | Even baking and consistency |
| Chill dough | Better shape and flavor |
| Proper cooling | Crisp edges and soft centers |
| Quality baking tools | Precision and ease of baking |
Frequently Asked Questions
Can I Make a Vegan or Gluten-Free Kitchen Sink Cookie?
Yes, you can make a vegan or gluten-free kitchen sink cookie. Use vegan substitutes like coconut oil or vegan butter instead of dairy.
Choose gluten-free flours like almond, oat, or rice flour to make it suitable for gluten sensitivities.
Swap regular chocolate chips for dairy-free options, and consider adding nuts or dried fruit for extra flavor.
With these adjustments, you’ll create a delicious, inclusive cookie that everyone can enjoy, regardless of dietary needs.
How Long Should I Bake My Kitchen Sink Cookies?
You should bake your kitchen sink cookies for about 10-12 minutes at 350°F. Keep an eye on them; they’re done when the edges turn golden.
For alternative baking techniques, try switching oven racks or using convection settings to ensure even baking.
To boost flavor, add a pinch of sea salt or a dash of vanilla before baking.
What Are the Best Storage Methods to Keep Cookies Fresh?
To keep your cookies fresh, use proper airtight storage to prevent them from becoming stale. Opt for the best container choices like a resealable plastic bag or an airtight tin, which helps maintain moisture and flavor.
Store cookies at room temperature for up to a week, or freeze them for longer preservation. Make sure to label containers with the date so you can keep track of freshness.
Enjoy your cookies at their best by using these simple storage tips!
Can I Freeze Kitchen Sink Cookie Dough for Later Use?
Yes, you can freeze kitchen sink cookie dough for later use. Think of it as putting your secret recipe on pause until you’re ready to bake.
Wrap the dough tightly using alternative freezing techniques like plastic wrap and aluminum foil, or store it in an airtight container. This helps preserve the flavor and keeps your dough fresh.
That way, you can enjoy freshly baked cookies anytime without losing that homemade charm.
How Do I Prevent Cookies From Spreading Too Much?
To prevent cookies from spreading too much, focus on controlling cookie thickness and using chilling techniques. Make your cookie dough thicker by adding a bit more flour, which helps it hold its shape.
Chill the dough for at least 30 minutes before baking. This firms up the fats and reduces spreading during baking. Proper chilling techniques and maintaining the right cookie thickness guarantee your cookies stay thick and delicious.
Conclusion
With endless mix-ins and creative twists, your kitchen sink cookie becomes a true canvas for flavor and texture. Think of it as a treasure chest overflowing with surprises, each bite offering a new adventure.
By balancing ingredients and customizing to your taste, you turn simple cookies into unforgettable treats. So, trust your instincts, experiment boldly, and let your kitchen sink cookie be the star of your baking story—a true masterpiece in the making.