10 Steps to Clean Your Kitchen Sink With Bleach
Cleaning your kitchen sink with bleach is a common task many people struggle with, especially when trying to keep everything hygienic and sparkling. If you’re looking for an easy, effective way to disinfect and brighten your sink, you’re not alone. Many folks find it tricky to do safely and thoroughly.
To clean your kitchen sink with bleach, start by gathering your supplies and putting on gloves. Clear the sink of dishes and debris, then rinse thoroughly.
Mix bleach with water—usually one part bleach to nine parts water—and apply it carefully, focusing on stains and high-touch areas like the faucet and drain. Scrub, let sit briefly, then rinse completely.
Finish by drying and polishing for a sparkling, hygienic finish. Keep going for detailed tips and safety advice.
Key Takeaways
- Clear out the sink, remove any debris, and give it a good rinse before you start applying bleach.
- Mix bleach with water, usually in a 1:9 ratio, and try it on a small spot first to be safe.
- Put on gloves and make sure the area is well-ventilated before you begin.
- Apply the diluted bleach to the sink surfaces, faucet, and drain, paying special attention to areas you touch often.
- Rinse everything thoroughly with clean water, then dry and buff the sink with a microfiber cloth to make it shine.
Why Bleach Is Effective for Cleaning Your Kitchen Sink

Bleach is highly effective for cleaning your kitchen sink because it kills bacteria, mold, and other germs quickly. Its powerful disinfecting properties make it great for removing stubborn stains and preventing odors.
Bleach quickly kills germs, removes stains, and keeps your sink smelling fresh and clean.
When used properly, bleach is safe—just dilute it as instructed and avoid mixing it with other chemicals, especially ammonia or acids. These combinations can cause dangerous chemical reactions, releasing toxic gases and risking your health.
Bleach works by breaking down the cell walls of germs, destroying viruses and bacteria on contact. Its strong oxidizing properties also help whiten and brighten surfaces, leaving your sink looking spotless.
Understanding chemical reactions is important for safe use. Always ensure proper ventilation and wear gloves when handling bleach. With the right precautions, you can safely enjoy bleach’s cleaning power while minimizing risks.
Gather Bleach, Cleaning Tools, and Prepare Your Kitchen
Before you start cleaning, gather all the supplies you’ll need to make the process smooth. Collect bleach, a scrub brush or sponge, gloves, and a clean cloth or towel.
Organizing your kitchen helps ensure everything is within reach, so you won’t have to stop midway. Check your cleaning schedule to find the best time to do this, and make it part of your routine.
Keep the bleach in a well-ventilated area and have measuring cups or a small container ready if you need to dilute it. Having all your tools ready saves time and makes the task more efficient.
Clear the sink of any dishes or clutter so you can focus solely on cleaning. Preparing your space ahead of time makes the process safer and more effective.
With everything in place, you’ll feel confident moving forward, knowing you’ve set the stage for a thorough and safe cleaning session.
Protect Yourself: Wear Gloves and Ventilate the Area
Before you get started, make sure to put on the right gloves—that way your skin stays protected from the bleach. It’s a good idea to open up some windows or turn on the vent to let fresh air flow in and help clear out those fumes. And remember, never touch the bleach directly with your skin—that’s just a safety no-no. Stay safe and take care!
Choose Appropriate Gloves
Protecting your skin is essential when handling bleach, so always wear sturdy rubber or latex gloves. Choosing the right glove types guarantees safety and prevents skin irritation or chemical burns.
Consider gloves that offer chemical resistance and a comfortable fit for better control. Safety precautions include inspecting gloves for tears or holes before use and changing them if they become damaged.
Opt for gloves made of natural rubber, nitrile, or neoprene for maximum protection. Ensure gloves are long enough to cover your wrists completely.
Select gloves with textured surfaces for better grip. Use gloves that are rated for chemical resistance and durability.
Open Windows for Ventilation
Have you thought about how proper ventilation can keep you safe while cleaning with bleach? Opening windows is a simple but important step to improve air quality and reduce fumes.
Fresh air helps disperse the strong chemical smell, which can irritate your eyes, nose, and throat. Try opening windows on opposite sides of the room to create a cross-breeze, or use a fan to push air outward.
This not only makes the environment safer but also helps bleach fumes dissipate faster. Good airflow keeps the air quality high and stops harmful vapors from building up.
Always prioritize ventilation when working with bleach. It helps you stay comfortable and protected during the cleaning process.
Avoid Skin Contact
While good ventilation helps clear out fumes, it’s just as important to prevent bleach from touching your skin. Skin irritation can happen quickly if bleach comes into contact with your skin, so protecting yourself is a must.
Always wear latex gloves to create a barrier and reduce contact. Be careful when handling the bleach to avoid splashes or spills. Working in a well-ventilated area also helps lower inhalation risks.
Keep a clean cloth nearby to wipe up any accidental splashes right away. Remember, preventing skin irritation keeps you comfortable and helps avoid chemical burns.
Taking these simple precautions makes your cleaning safer and more effective, preventing unnecessary discomfort or health issues.
Clear the Sink and Remove Any Debris
First things first, grab a paper towel or a cloth and wipe away any food particles or loose debris from the sink. It’s a simple step, but it really helps to clear the surface and make the cleaning process easier.
Once you’ve done that, your sink will be free of obstructions, and you’ll be all set to move on to the next step, like applying bleach or giving it a thorough clean.
Remove Food Particles
Before you can effectively clean your sink with bleach, it’s important to remove any food particles and debris. Food scraps can trap odors and make your sink smell over time. Start by checking the sink for leftover food or debris stuck in the drain or on the surface.
Use a paper towel or spatula to carefully lift out larger pieces. This step ensures that the bleach can work directly on the surfaces without anything blocking it, making it more effective at disinfecting.
Discard food scraps in the trash or compost bin, then rinse the sink thoroughly with warm water. Use a brush or cloth to loosen stubborn debris and remove any visible food residues around the drain openings.
This process creates a clean foundation, preventing lingering odors and making sure your sink is thoroughly sanitized before applying bleach.
Clear Surface Debris
To guarantee your sink is fully prepared for cleaning, remove any surface debris and clear the sink of loose items. This step is essential for good kitchen organization and effective sink maintenance.
Take a few moments to clear away dishes, utensils, and any crumbs or residues. By doing so, you reveal a clean surface that’s easier to scrub and disinfect.
Ensuring the sink is free of debris also prevents dirt from spreading when you apply bleach. A clutter-free sink makes your cleaning process more efficient and helps maintain your kitchen’s overall neatness.
Regularly clearing surface debris keeps your sink in top shape, making future cleaning easier and supporting better kitchen organization.
Properly Dilute Bleach for Safe Cleaning
Using bleach at the right concentration is essential for safe and effective cleaning. You want a strong disinfectant without risking damage or harmful fumes. To get this, dilute bleach properly—generally, mix 1 part bleach with 9 parts water. This ratio helps remove bacteria and mold effectively while being safe for your sink surfaces.
Dilute bleach 1 part bleach to 9 parts water for safe, effective cleaning of sinks and surfaces.
Remember, if you’re thinking about alternatives like cleaning vinegar, it’s less potent and better for light debris or everyday maintenance. Never mix bleach with vinegar or other cleaners, as this can produce dangerous fumes. Proper dilution also helps prevent surface corrosion and keeps your sink fixtures in good shape.
The right mix can vary depending on how dirty the grime or stains are. Always check the manufacturer’s instructions on the bleach label for specific dilution ratios. Use measuring tools to be accurate, and avoid over-concentrating, which can harm surfaces.
Store undiluted bleach safely out of children’s reach. For light cleaning tasks, consider alternative options to keep your surfaces safe and clean without risking damage.
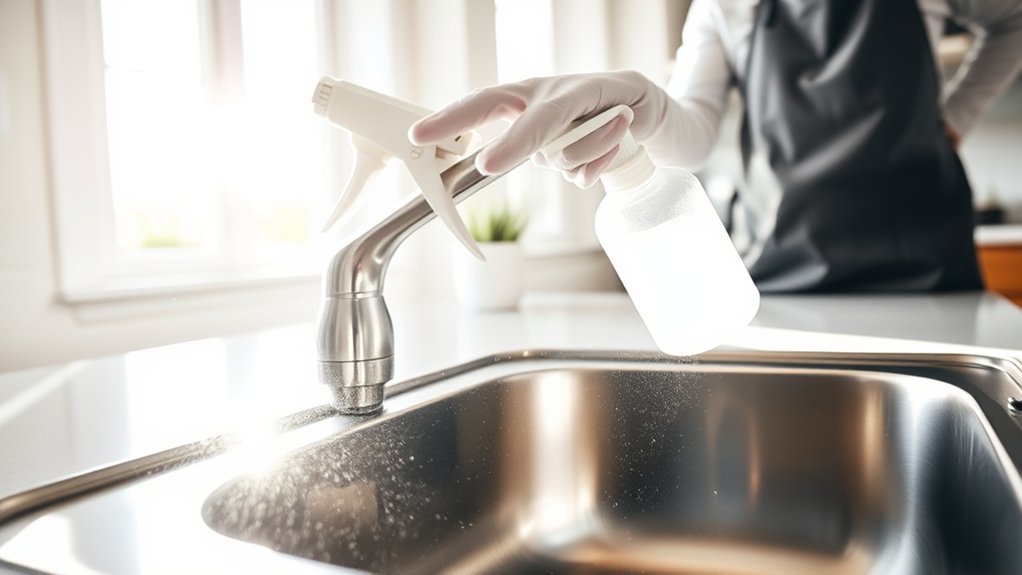
Apply Bleach to Sink Surfaces, Faucet, and Drain
Now, it’s time to apply the bleach solution to your sink surfaces, faucet, and drain. Just make sure you coat all those areas evenly, but don’t go overboard with the amount. You want to cover everything without creating a mess or wasting the solution.
Once you’ve done that, be sure to rinse everything thoroughly. Use some effective rinsing techniques to make sure you remove any leftover residue. This way, your sink will be clean and fresh without any harsh bleach traces left behind.
Preparing Bleach Solution
Begin by donning gloves and ensuring good ventilation before handling bleach. To prepare the solution, measure out a small amount of bleach—usually one part bleach to ten parts water.
This dilution works well for disinfecting your sink, faucet, and drain without causing any damage. Keeping a regular cleaning schedule helps maintain your kitchen organization and prevents buildup.
Consider these steps: use a clean bucket or container for mixing. Mix the bleach and water thoroughly before applying it. Test a small area first to avoid surface discoloration. And always prepare a fresh solution for each cleaning session to keep it effective.
Proper preparation makes cleaning safe and efficient, helping your kitchen surfaces stay sparkling and germ-free.
Safely Applying Bleach
To safely apply the bleach solution, start by wetting the sink surfaces, faucet, and drain with water. This helps prevent the bleach from damaging your fixtures and ensures even coverage.
When handling bleach, wear gloves and work in a well-ventilated area. Proper kitchen ventilation is key to avoiding fumes, so open windows or turn on the exhaust fan.
Carefully pour or apply the diluted bleach onto the sink surfaces, avoiding splashes or spills. Focus on the faucet and drain areas, as these spots tend to harbor bacteria and grime.
Keep children and pets away during this process. Following these steps helps you clean effectively while minimizing health risks associated with bleach use.
Effective Rinsing Techniques
Once you’ve applied the bleach solution to the sink, faucet, and drain, thorough rinsing is essential to remove any residue and prevent potential damage. Proper rinsing makes sure no harmful bleach stays behind that could harm surfaces or your skin.
To do this effectively, use plenty of clean water and wipe surfaces with a sponge or cloth to lift away any remaining bleach. Don’t skimp on rinsing—comprehensive rinsing is key for safety and cleanliness.
Avoid common myths that suggest minimal rinsing is enough. Instead, make sure you rinse thoroughly to keep your sink sparkling and germ-free without risking damage from leftover chemicals.
Consider eco-friendly options like vinegar or baking soda, which are less harsh and more sustainable. When rinsing, pay special attention to crevices around the faucet and drain, where buildup can hide.
This step helps you achieve a spotless, germ-free sink while avoiding damage from residual chemicals.
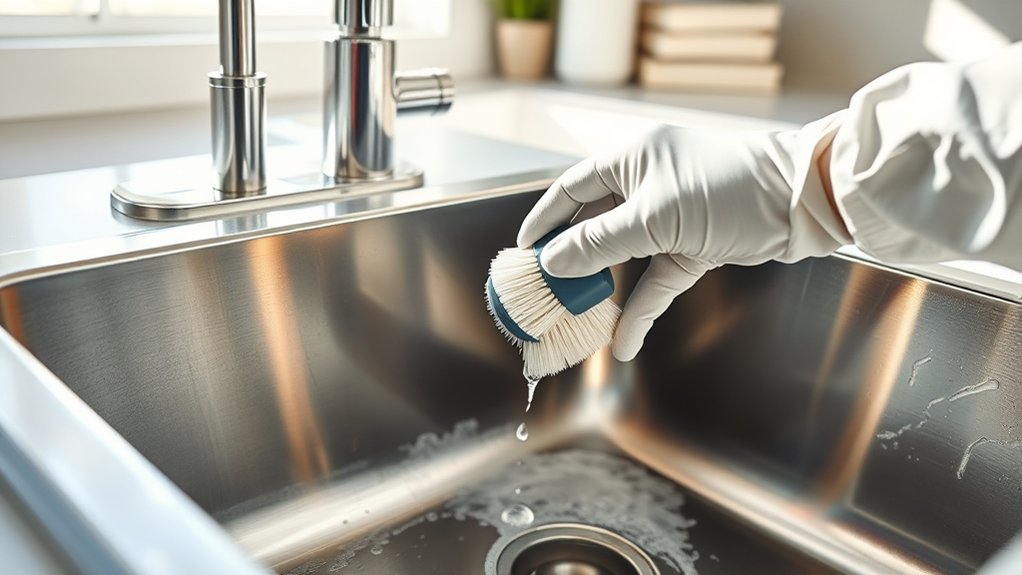
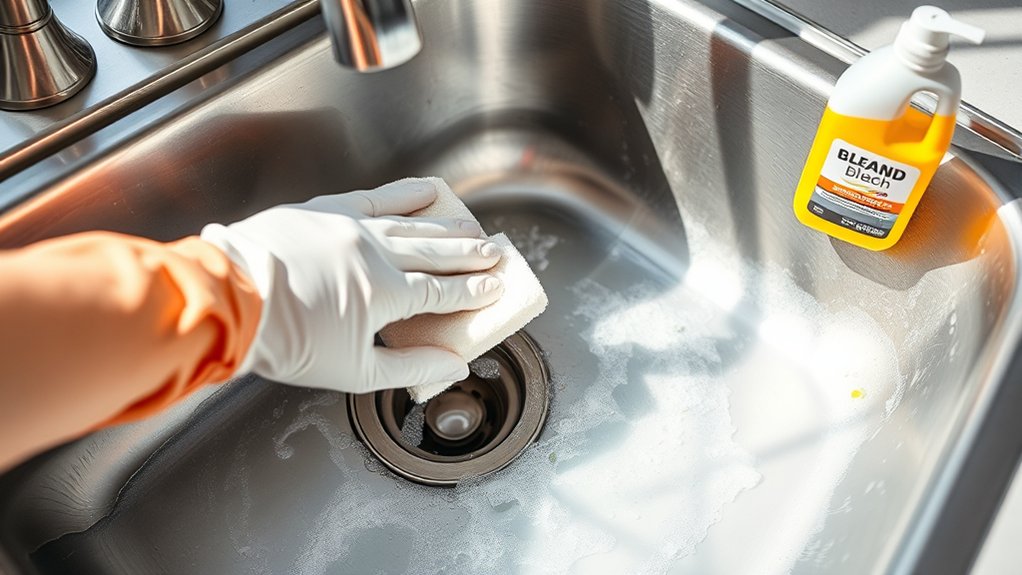
Scrub Stubborn Stains and Discolored Areas Thoroughly
Stubborn stains and discolored areas can be tricky to remove, but thorough scrubbing is essential to restore your sink’s shine. Use a soft scrub brush or sponge with a mix of bleach and water to tackle stains effectively.
Focus on areas with visible discoloration or stubborn stains, applying firm, circular motions to lift the grime. For tough spots, let the bleach solution sit for a few minutes before scrubbing again.
Apply firm, circular motions to stubborn stains, letting the bleach sit before scrubbing for best results.
Discolored patches often come from mineral deposits or food residue, so pay extra attention to these zones. Avoid aggressive scrubbing that might scratch the surface; instead, use steady pressure.
Consistent, deliberate scrubbing helps break down stains and patches, making them easier to remove. After scrubbing thoroughly, rinse well to remove all bleach residues and prevent re-staining or damage.
Proper scrubbing keeps your sink looking clean and bright.
Rinse and Remove Residual Bleach From the Sink
After you’ve scrubbed away the stains, it’s important to thoroughly rinse the sink to remove any remaining bleach. This step makes sure no leftover cleaning supplies stay behind, which could cause damage or safety issues.
Use plenty of clean water to flush out all traces of bleach, focusing on corners and hard-to-reach spots. Proper rinsing helps prevent lingering chemical smells and keeps the sink safe for daily use.
To improve the process, consider these tips:
- Use a gentle stream of water to wash away residual bleach completely.
- Check the sink for spots that might need extra rinsing.
- Avoid harsh cleaning supplies immediately afterward to prevent reactions.
- Always wear gloves when handling bleach and rinsing to stay safe.
Following these steps ensures your sink is clean, safe, and preserves the effectiveness of your cleaning routine.
Disinfect the Drain and Faucet Handles With Bleach
To effectively disinfect your drain and faucet handles, start by applying a diluted bleach solution directly onto these high-touch areas. Use a clean cloth or sponge to wipe all surfaces thoroughly, making sure the solution stays on for at least a minute.
This step helps eliminate bacteria and germs that thrive on frequently touched spots, supporting proper sink maintenance. If you prefer, you can use bleach alternatives like hydrogen peroxide or commercial disinfectants that work just as well without harsh fumes.
After disinfecting, let the solution sit for a few minutes, then rinse everything with clean water to remove any residue. Dry the handles and drain area with a clean towel to prevent water spots and further bacterial growth.
Regularly disinfecting these areas keeps your kitchen safer and helps maintain a clean, hygienic environment. Remember, consistent sink maintenance prevents buildup and keeps your sink sparkling and germ-free.
Dry and Polish Your Sink for a Sparkling Finish
Once you’ve disinfected and rinsed your sink, it’s time to give it a thorough dry and polish. Proper drying prevents water spots and helps keep its shine intact.
Use a clean, dry microfiber cloth to gently wipe the entire surface, making sure no moisture remains. For a polished look, buff the sink in circular motions to boost its natural luster.
You can also apply a small amount of olive oil or vinegar to enhance the shine and achieve a streak-free finish. To remove stubborn stains, focus on spots with a baking soda paste or a gentle scrub brush.
Remember to dry regularly to prevent water spots and maintain that polished, sparkling appearance.
Frequently Asked Questions
How Often Should I Clean My Kitchen Sink With Bleach?
You should clean your kitchen sink with bleach once a month for ideal cleaning. This helps eliminate germs, mold, and odors effectively.
Always follow safety precautions, like wearing gloves and ensuring proper ventilation, to protect yourself from fumes.
Avoid overusing bleach, and rinse the sink thoroughly afterward. Regular cleaning keeps your sink hygienic and safe.
But don’t forget to balance cleaning with other maintenance routines for the best results.
Can I Use Bleach on All Types of Kitchen Sinks?
Sure, you can bleach your kitchen sink, but not all types are fans of the idea.
Stainless steel sinks love it—just don’t leave bleach sitting too long or you might get a dull finish.
Porcelain sinks? Better skip the bleach unless you want to turn them into abstract art.
Always check manufacturer guidelines first—your sink’s not auditioning for a bleach commercial!
What Are the Signs That My Sink Needs Bleaching?
You’ll want to bleach your sink when you notice stains that won’t come off or a persistent bad odor, which indicates bacteria buildup.
If your sink looks dull or has visible discoloration, it’s also a sign for stain removal. Bleaching helps eliminate bacteria and brighten the surface.
Regularly inspecting your sink for these signs guarantees you maintain a hygienic environment and keep your kitchen looking clean and fresh.
Is It Safe to Combine Bleach With Other Cleaning Products?
Combining bleach with other cleaning products is like stirring up a chemical volcano—dangerous and unpredictable. You should never mix bleach with ammonia or acids, as it causes hazardous chemical reactions releasing toxic gases.
Always guarantee good ventilation tips, like opening windows and turning on fans, before cleaning. Stick to one product at a time, and if you’re unsure, read labels carefully to stay safe and avoid dangerous reactions.
How Do I Prevent Mold and Mildew After Cleaning With Bleach?
To prevent mold and mildew after cleaning with bleach, make sure your sink dries thoroughly afterward. Moisture promotes mold growth, so keeping the area dry is key.
Use good ventilation to help keep the space dry and reduce humidity. This makes it harder for mold and mildew to take hold.
Regularly check your sink for any signs of mold or mildew. If you see any, clean and address them promptly.
Conclusion
Cleaning your kitchen sink with bleach is a quick and effective way to keep it spotless and germ-free. Did you know that regular cleaning can reduce bacteria by up to 99%? Just remember to follow safety steps, like diluting properly and wearing gloves.
With these 10 simple steps, you’ll enjoy a sparkling sink that’s not only clean but also healthier for your home. Keeping up with cleaning routines makes a real difference. You’ll love the fresh, shiny results every time!
Using bleach properly ensures your sink stays clean and safe. So, give your kitchen sink the attention it deserves with these easy tips. A clean sink is the key to a healthier, more inviting kitchen.