6 Simple Steps to Plumb a Double Kitchen Sink
Many homeowners find installing a double kitchen sink to be a daunting task, and you’re not alone in feeling this way. It’s common to worry about making mistakes or not knowing where to start.
Luckily, with a clear plan, you can tackle this project confidently.
To plumb a double kitchen sink in six simple steps, start by gathering all your tools and materials. Next, turn off water, disconnect your old sink, and remove it carefully.
Measure and prepare the countertop for your new sink, then set it in place and secure it.
Connect the drain pipes and water lines securely, making sure all fittings are tight.
Finally, test for leaks and proper drainage. Continue to follow these guidelines for detailed tips to guarantee a smooth installation.
Key Takeaways
- Turn off the water supply, disconnect the existing plumbing, and carefully remove the old sink.
- Measure and cut the countertop for the new double sink, making sure it fits properly.
- Install the sink into the countertop, seal the edges with silicone, and secure it with mounting brackets.
- Connect the drain pipes and supply hoses securely, but don’t overtighten.
- Finally, test for leaks, proper drainage, and venting to ensure everything works smoothly.
Gather Tools and Materials for Installing a Double Kitchen Sink
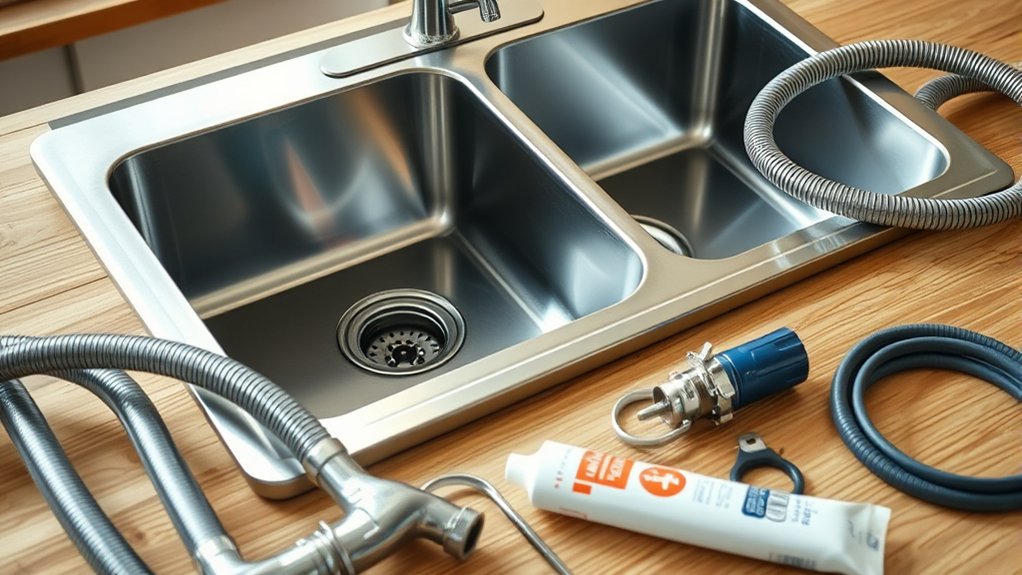
Before you start installing your double kitchen sink, make sure you’ve gathered all the tools and materials you’ll need. Basic items include a wrench, screwdrivers, plumber’s putty, a pipe wrench, and maybe a jigsaw if trimming is necessary.
Don’t forget the new sink itself, along with the faucet, drain assembly, and mounting brackets. Having extra supplies like silicone sealant, Teflon tape, and a bucket for catching water can make the job much easier.
Taking the time to prepare everything beforehand helps ensure a smooth installation and avoids hiccups later on. As you work, remember to keep surfaces clean by wiping them regularly and steer clear of harsh chemicals that could damage the sink’s finish.
Proper installation is key to good sink maintenance, so double-check all connections for leaks before you finish. Gathering everything in advance saves time, keeps your project on track, and makes the whole process straightforward and efficient.
Disconnect and Remove Your Old Sink
Start by turning off the water supply valves beneath the sink to prevent leaks during removal. Then, disconnect the water lines from the faucet and drain assembly.
If your sink has a disposal, unplug it and detach it from the mounting assembly. Check plumbing codes to make sure you’re following proper removal procedures.
Use a basin or bucket to catch any leftover water. Loosen the clips or brackets that hold the sink to the countertop, and carefully lift the sink out.
Here’s a quick overview:
| Step | Action |
|---|---|
| 1 | Turn off water supply valves |
| 2 | Disconnect water lines and disposal |
| 3 | Loosen clips or mounting brackets |
| 4 | Lift out the sink |
Removing your old sink carefully helps prevent damage to the countertop and gets you ready to install the new one.
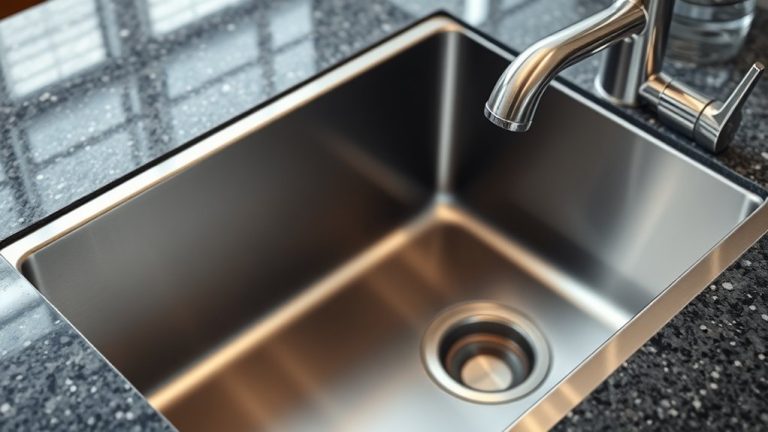
Measure and Prepare Your Countertop for the New Sink
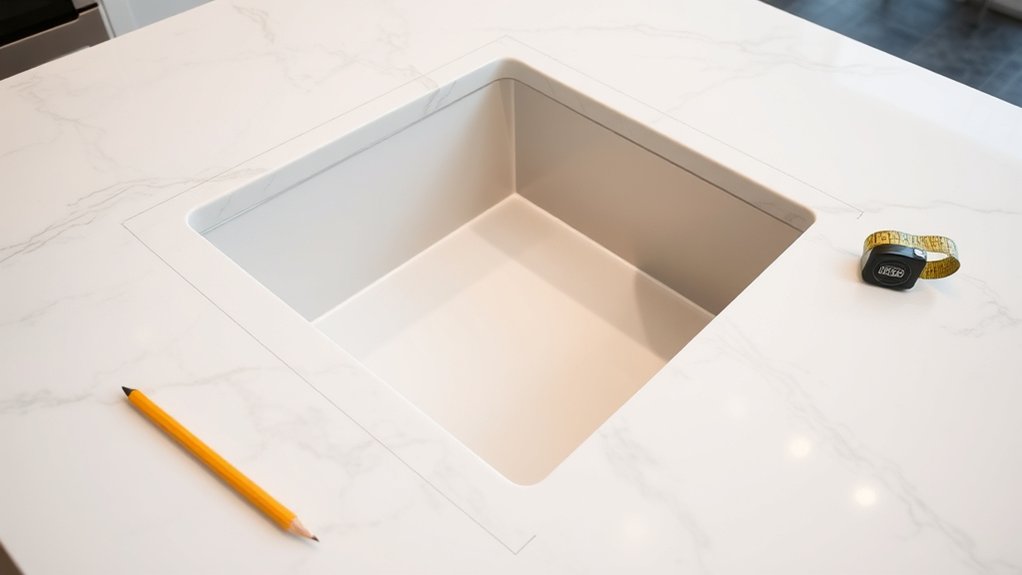
To guarantee your new sink fits perfectly, carefully measure the cutout area on your countertop. Use a tape measure to note the width and length of the opening needed for your double sink. Check the sink’s specifications to confirm your measurements match the sink material’s requirements, especially since different materials like stainless steel, porcelain, or composite might have specific dimensions.
Think about the durability of your countertop. If it’s wood or laminate, you may need extra reinforcement around the cutout to prevent damage. Mark the measurements clearly with a pencil, and double-check your markings before making any cuts.
Getting the measurements right prevents gaps and ensures a secure fit. This is important for proper plumbing and the overall durability of your installation. Taking the time to prepare your countertop carefully will make the installation smoother and help your double sink work well for years to come.
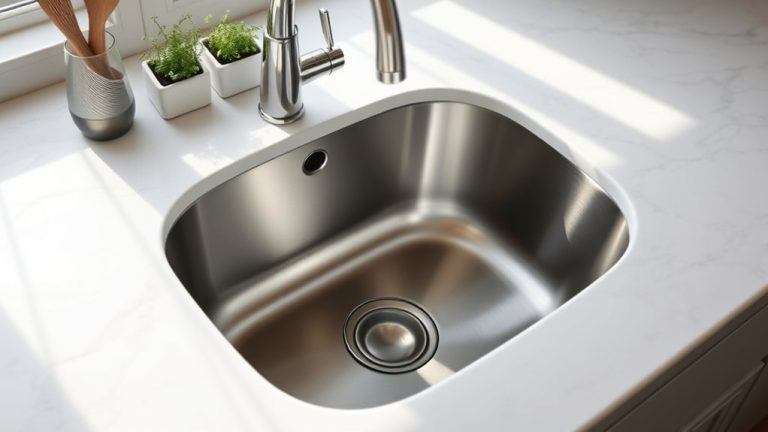
Set and Secure Your Double Sink in the Countertop
First, double-check that your cutout is just the right size so the sink fits nice and snug. Once you’re happy with the fit, spread the sealant evenly around the edge to help keep everything watertight. After that, gently press the sink into place, making sure it’s level, and then secure it so it stays steady and secure.
Measure Cutout Precisely
Before you start cutting the countertop, carefully measure and mark the area for your double sink. Use the sink’s dimensions to make sure your template or markings are accurate.
Double-check your measurements for length, width, and depth. Even small errors can cause fit and function issues. Precise measurements help prevent gaps or misalignments.
Use a pencil or masking tape to clearly mark the outline. Verify all measurements before moving on. Taking your time now will save you from costly mistakes later.
Make sure the markings match the sink’s specs and the countertop’s layout. Once you’re confident, you can cut along the lines, knowing your cutout will be precise and ready for installation.
Apply Sealant Properly
Once you’ve fitted the sink into the cutout, applying sealant is essential to prevent leaks and guarantee a secure fit. Use a high-quality sealant designed for kitchen sinks, and apply it evenly around the entire perimeter of the drain and edge of the sink.
Proper sealing techniques involve creating a continuous bead of sealant without gaps or breaks. When applying, keep a steady hand and work quickly to avoid excess mess.
After placing the sink, use a damp cloth to smooth out the sealant, ensuring good contact between the sink and countertop. This step seals any small gaps and prevents water from seeping underneath.
Take your time with sealant application to ensure a tight, waterproof seal that will last.
Secure Sink Firmly
How do you guarantee your double sink stays securely in place? First, use a sturdy mounting bracket to fasten the sink tightly to the countertop. Attach the bracket according to the manufacturer’s instructions, making sure it’s evenly aligned.
To prevent slipping, place anti-slip pads underneath the sink’s edges or mounting points. These pads give extra grip and stability, especially on smooth surfaces. Once the bracket is secured and pads are in place, double-check that the sink doesn’t move when you press or pull on it.
Properly securing your sink helps prevent leaks, damage, and shifting over time. Taking these steps ensures your double sink stays firmly set and stable, giving you peace of mind during daily use.
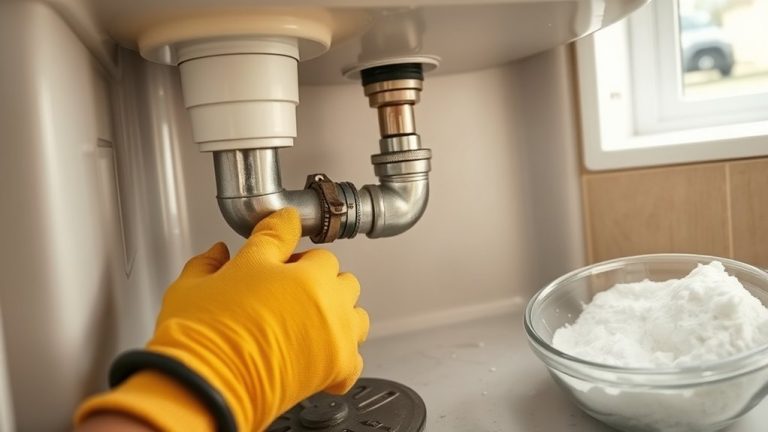
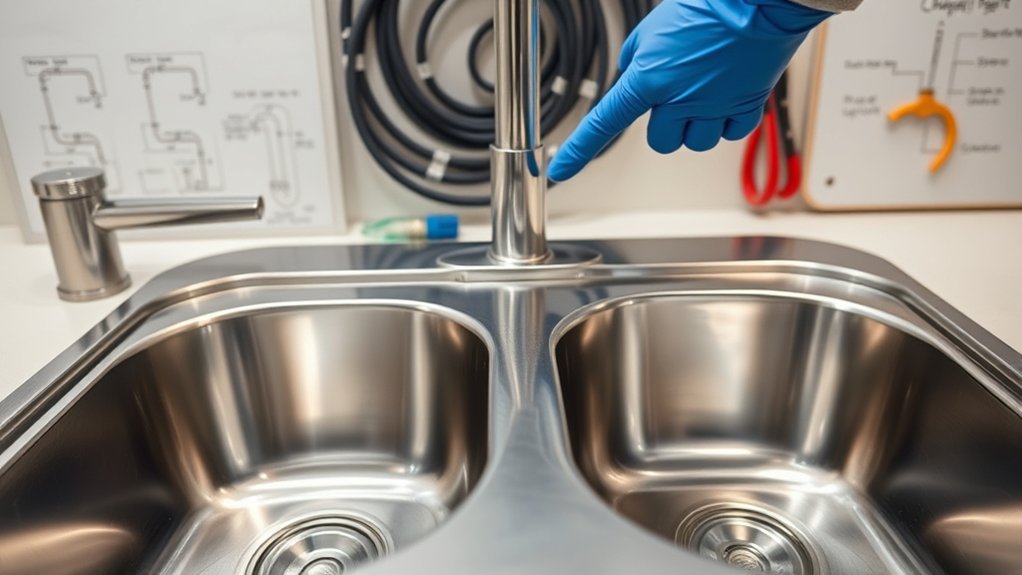
Connect the Drain Pipes and Water Lines
Connecting the drain pipes and water lines is pretty straightforward, but you’ll want to pay attention to details to make sure everything works right.
Start by attaching the drain pipes to the sink’s tailpieces, making sure they fit snugly and are secured with slip nuts.
Attach drain pipes snugly to sink tailpieces with slip nuts for secure, leak-free connections.
Use pipe insulation around the drain pipes if needed to prevent noise and condensation.
When connecting the water lines, attach the hot and cold supply hoses to their respective valves, tightening fittings securely but not over-tightening.
Check that the water pressure is adequate; if it’s too high, think about installing a pressure regulator to prevent damage.
Make sure all connections are tight to avoid leaks, but be careful not to overtighten, which can cause damage.
Once everything is connected, double-check the alignment and fittings.
Properly insulated pipes and secure connections help maintain steady water pressure and prevent future issues, setting a solid foundation for your double kitchen sink plumbing.
Test for Leaks and Proper Drainage, and Fix Any Problems
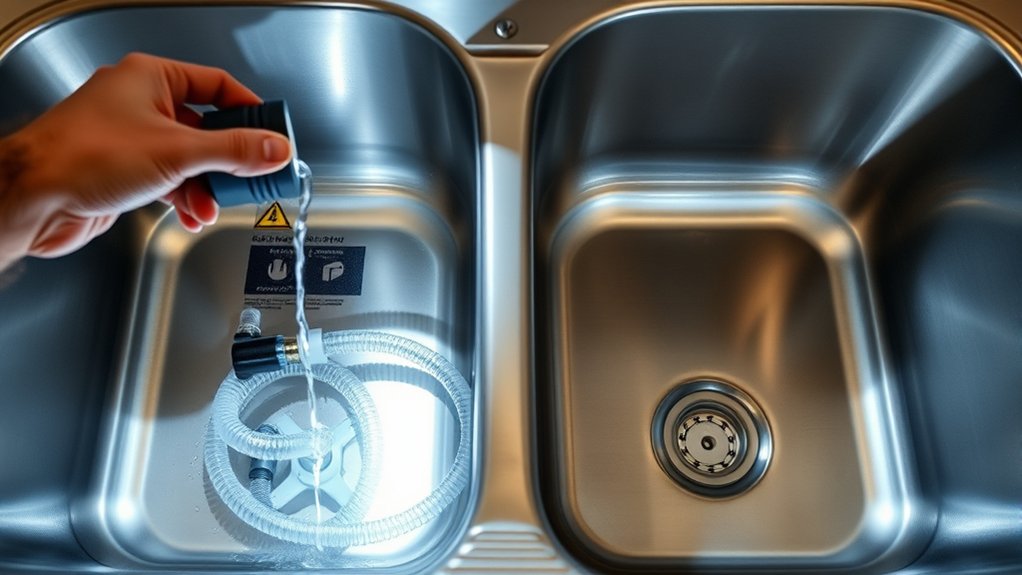
Once you’ve finished hooking everything up, turn on the water and run it through both sinks. Keep an eye out for any leaks around the drain fittings and pipes—that’s important. Also, watch how the water drains; it should flow smoothly without any pooling or slow drainage.
If you notice any issues, don’t wait—tighten up those fittings or adjust the pipes until everything looks good. It’s better to fix problems now than deal with bigger messes later on.
Check for Leaks
Before you finish installing your double kitchen sink, it’s important to check for leaks and ensure proper drainage. Turn on the water and watch all the connections carefully, especially the drain pipes, supply lines, and fittings.
Look for drips or moisture around the joints and fittings to spot leaks. If you see any, try tightening the fittings or replacing damaged washers. Just make sure everything is snug but not overtightened, as that can cause damage.
Use a paper towel or cloth to catch slow leaks that might not be immediately visible. Detecting leaks early helps prevent water damage and future plumbing problems.
Fix any issues right away so your sink stays leak-free and works efficiently.
Ensure Proper Drainage
How can you be certain your double kitchen sink drains properly? First, run water in both basins and check that it flows smoothly without pooling or draining slowly. Proper water pressure is essential—if drainage feels sluggish, you might have a clog or venting issue.
Next, inspect the venting systems to verify they aren’t blocked, which can cause drainage problems. Listen for gurgling sounds or slow draining, signs that venting isn’t functioning correctly. Once the water runs freely, check for leaks around the drain pipes and connections.
If you notice any drips or moisture, tighten fittings or replace damaged sections. Confirm that air flows freely through the venting system to prevent future drainage issues, ensuring your sink functions efficiently.
Frequently Asked Questions
What Tools Are Essential for Plumbing a Double Kitchen Sink?
You need essential tools like a pipe wrench, adjustable pliers, and a utility knife. Make sure to have pipe fittings ready to connect the drain assembly and supply lines.
A drain assembly kit makes installing the sink’s drains easier, while pipe wrenches help tighten fittings securely. Pliers are great for securing connections, and a hacksaw might be needed for cutting pipes.
Having these tools on hand will help ensure a smooth, leak-free installation of your double kitchen sink.
How Do I Prevent Damage to My Countertop During Installation?
To prevent damage during installation, start by applying protective materials like cardboard or foam padding around the countertop edges. This helps keep your countertop safe as you work.
Stay safe by handling tools carefully and following instructions closely. Keeping your workspace organized also makes a big difference.
Avoid leaning on or using too much force on the countertop. These simple steps help prevent scratches or cracks, so your countertop stays in great shape and the installation goes smoothly.
Can I Install a Double Sink Without Professional Help?
Yes, you can definitely install a double sink yourself. Did you know that around 70% of homeowners try DIY plumbing projects?
With the right tools and step-by-step guidance, you can handle it confidently. Just remember to measure accurately, seal all connections properly, and plan for sink maintenance.
Taking your time ensures a successful install, saving you money and giving you a satisfying sense of accomplishment.
What Are Common Signs of Leaks After Installation?
After installation, keep an eye out for signs of leaks like puddles under the sink, decreased water pressure, or musty odors.
You might also see damp cabinets or water stains, which can be signs of a leak.
It’s a good idea to check your pipes regularly for corrosion, as this can cause leaks over time.
If you notice water leaks or signs of corrosion, tighten fittings or replace damaged pipes quickly.
Staying vigilant helps prevent bigger problems and keeps your double sink working smoothly.
How Often Should I Inspect My Plumbing Connections?
You should inspect your plumbing connections at least once a month to catch any leaks early.
Make it a habit to include visual checks for drips, corrosion, or dampness around fittings.
Use simple tips like tightening loose connections and listening for unusual sounds.
Regular inspections help prevent costly repairs and keep your double kitchen sink working smoothly.
Staying proactive keeps your plumbing reliable and leak-free.
Conclusion
Now that you’ve followed these simple steps, your double kitchen sink should be working perfectly.
Remember to double-check all connections and test for leaks—no one wants a soggy surprise!
Take your time and channel your inner handyman, just like the old-time plumbers did.
With patience and a bit of elbow grease, you’ll have a shiny, functional sink ready for anything you toss its way.